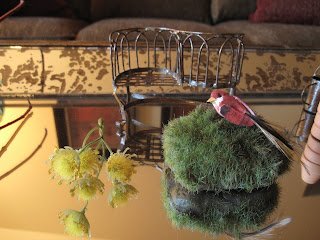
Ever since I was a child, tiny things have always fascinated me. My Grandma Jean had a little curio cabinet with all sorts of little animals and I absolutely loved it as a girl. There's something so darling about seeing something usually termed as "large" or "big" and being able to hold it in the palm of your hand. As a middle schooler I had dollhouse which my Grandpa had dug out from his neighbor's trash. He refurbished it and gave it to me as a present. I literally spent hours playing with my Victorian Playmobile (best kids toys ever!) and making all kinds of tiny articles for them. Such as food made out of Sculpey Clay, tiny bed sheets from scraps of material, cutting out little pictures from magazines to hang on the walls.....and so on. Oh, yes I was into it. Okay. Back to the future, oops, present. Lately I have been seeing a lot of miniature gardens both real and faux popping up in gift stores, garden centers, home decor stores, and of course Pinterest. My mom had a perfect spot for one. She asked me to make a faux mini garden for her front room coffee table. Here's what you'll need for a miniature garden:
A planter for your garden. This could be a miniature green house like the one I purchased at this store or it could be a simple low cut pot. Basically anything that will showcase your miniature garden in style. ;-) Choosing the size of your container will dictate how big our small you want the garden to be.
Obtain some small leafed faux plants from your local craft store. Baby ferns, small vines, smaller flowers that you can break off etc. I even cut a couple of red dogwood branches from the garden, entwined it with vines I purchased and used it as a tree.
You can find miniature pots at a craft store like Hobby Lobby (don't forget their 40% off coupon) or Michaels. I found a small loveseat bench at a local shop downtown, watering can, a few faux succulents, and a little turtle. Basically anything that catches your eye or you fall in love with, go for it! Home/garden decor stores and craft stores will be your best resource.
You will also need some moss; a moss mat and some loose moss, a small piece of cardboard, sissors, wire cutters, and a glue gun.
Measure and cut the cardboard to fit your container. If you have a low potted planter, place and glue floral styrofoam in the bottom to raise up your cardboard piece. Cut the moss mat so that it has a 1/2 to 1" excess around the edges of the cardboard piece. Taking the cardboard, place and glue the loose moss on top. This will give the illusion of the "ground" having some and texture so it's not completely flat. Turn the moss side so it's facing down on the wrong side of the moss mat (see picture). Glue up the edges around the cardboard. Ta-da!
Place inside your planter and now the fun part begins! Begin setting up your garden with the miniature materials you've purchased. Use the wire cutters to cut any materials down so they are smaller. Once you have things how you want them begin discreetly glueing to your base. I even added some dirt spilling out of one of my pots and though you can't see it, there's a small ladybug climbing up one of the ferns.
And you're done! Place in an area where you will enjoy it daily and where the light will showcase your work. Revel in the fact you will never have to water it! ;-)
Love,
Bethany V.


No comments:
Post a Comment